Showing posts with label recipe. Show all posts

Monday, August 31, 2015

zombie purse and catch up

This month was fairly hectic with me heading back to work.    I had to change my routine with Osa to make sure she got enough playtime in after I got home.....and with the heat, that was difficult.  I haven't had much time for blogging either.  But that doesn't mean I am not doing "stuff!"

I am still plugging away on my CAL squares:


And for my craft along theme of altered art, I made a few things:

I already posted how I decoupaged a cigar box for work, along with a large P for my door.  But I also made a cigar box purse.    This one is for October.....


I have also been busy in the kitchen.....harvesting basil for pureed cubes.  I harvested 3 plants, 4 to go....


 and making my fresh strawberry cake, just because....


Dean and I attended a gala a couple weeks ago....here we are with some friends and co-workers...


no, they aren't ALL women, here I am with Ed....


This is one of the table arrangements, the roses were white.  It is drying naturally and still so lovely.


Wishing you all a happy week!

Monday, July 27, 2015

Recipe Box: Lentil Soup

It has been awhile since I've posted a recipe of my mom's!

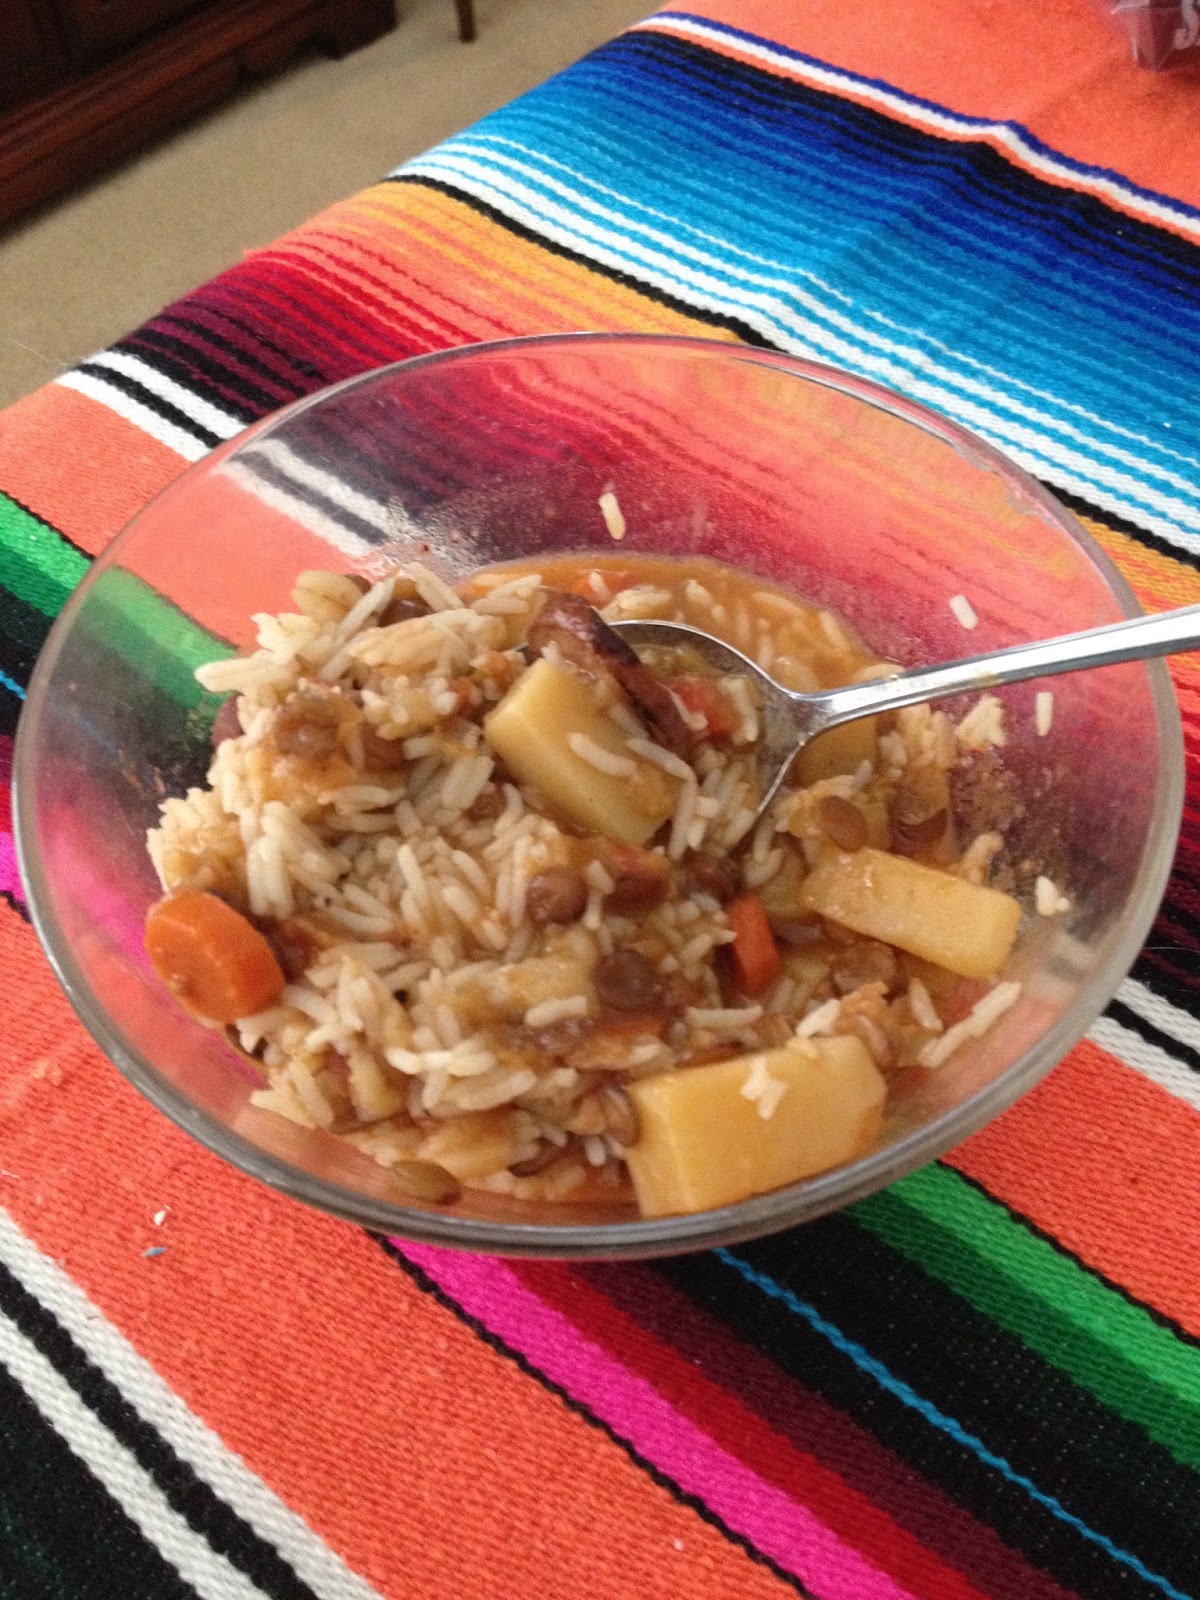
Last week when Tammy was here, I made some lentil soup.   It was unbelievably good so I thought I'd share the recipe.  I took my mom's recipe and tweaked it for my family.  

This photo shows it over rice.  


Mumu's and mine...Lentil Soup

1 cup green or brown lentils.  (Red ones don't take as long to cook and will explode!  If you use them, adjust the cooking time and add them at the end.)
1 tsp salt
1/2 tsp black pepper
1 tablespoon minced garlic
2 large carrots, chopped (set aside)
1 large onion, chopped
3 ribs celery, chopped
1-2 small potatoes, diced (set aside)
4 ounces red wine
2 large or 4 small bay leaves
1 large can diced tomatoes in juice
1 pound turkey sausage
8+ cups stock, broth or water.
1/4-1/2 tsp cayenne (optional)
4 chicken bouillon cubes

Slice one pound of smoked turkey sausage and sear on both sides.  Put in a bowl and Set aside.
(Deglaze the pan with a little water and use in the stock)
Saute the seasonings, bay leaves, onion, garlic and celery for a couple minutes.  
Add the lentils, sausage, red wine and the bouillon cubes.  Cover with stock, put on the lid.
Bring to a boil and then immediately turn down the heat and simmer on medium low for about 30 minutes.
Add the carrots and potatoes.  Return to heat for another 30 minutes or until they are soft.

*You can adjust the seasonings before serving.  I usually add more salt. TASTE it first as bouillon cubes are salty.

Lentils tend to continue absorbing liquid when put in the fridge so we put our leftovers over rice.

Saturday, June 13, 2015

summer eatin'

Funny how when summer hits, I start cooking more.  I'm good about cooking year 'round but having some time off sure does allow me to relax and enjoy it more.  I have more time to think about what I want to make...


Dean made his famous trout almondine one night.  It was perfect.  I was allowed to do the side dishes but he shoo-ed me out of the kitchen when he started the fish!


 Smothered beef burritos...a modified pinterest recipe


Curried Chicken salad


My dad's "snapper in a paper bag"

White chocolate macadamia nut cheesecake with caramel drizzle...


 Sliders...I've been making them this way since 5th grade!


Shrimp and pasta a modified pinterest recipe...


Cinnamon rolls...


No food beats a home cooked meal.  Hands down.  
Does it take time?  Yep.  
Is it worth it?  Absolutely!

Monday, April 6, 2015

Receipe Box! Vegetable-Beef soup

We eat a lot of soup in our family and this is one of Dean's favorites.  If he is sick, he asks for it. It is a three step process but takes little time and is super easy.  I can even make this on a night after work.

This soup didn't actually have a recipe.  My mom just threw stuff together.  
One day, I jotted it all down as she went.   I was about 13 years old at the time so my directions were horrid and I'm sure I left stuff out.  Doesn't matter, it is comfort food in a bowl and so good.  Not highly seasoned, this isn't gumbo y'all!  Make sure to have a good loaf of bread to sop up all the goodness the spoon can't reach!  


Mumu's old fashioned vegetable beef soup*

2 pounds stew meat
1 large can WHOLE tomatoes, squished.  
1 quart water with beef boullion cubes (you may need to add more water later)
1 large onion-WHOLE

Put the above ingredients into a large stock pot.  Cover, bring to a boil and then turn  down to medium.   Let it simmer for 1 hour.  After an hour, carefully remove the whole onion.  Squish it a bit to get the juices out.

After an hour, add:

1 can lima beans
1 can shoepeg (white nibblet) corn
2 potatoes, diced
1 onion, diced
2 celery stalks, diced
2-3 carrots, diced (I use frozen carrots to save prep time)  We like a LOT of carrots.  

Simmer until carrots and potatoes are almost tender. The last 10 minutes, toss in a handful of broken spaghetti.  continue cooking until the pasta is done.

Taste test for salt and pepper, serve!

Modifications:

*The original recipe calls for cubed arm roast but use stew meat because it takes less prep time.  *You can use a large can of diced tomatoes instead.  
*You can sub beef stock/broth if you want.  Might change the flavor a bit...don't know, never tried it!
*Some folks in my family don't want the pasta so I use a cup of ditalini pasta and cook it separately.  That way, people can just add it to their own bowls.
*Remember that if you add more veggies, you need to compensate with more liquid.


Monday, March 2, 2015

Recipe Box: Peach Cobbler

I have an easy cobbler recipe that I have shared on here before but I thought I would share this one too.  It is a little different and it is nice to have options.

I do not recall my mother EVER making this....but she must have because she wrote how certain family members enjoyed it.


Here is the recipe.  The crossed out name is my sister's EX husband!  hahahaha!!


I'm glad I made it even though I didn't have fresh peaches.  I just used a large can of sliced and drained them well.  I tossed them with half a cup of sugar but the cobbler wasn't sweet enough.  Next time, I'll just use the entire cup as suggested.  After all, it is dessert!

and just the right size for me......

Everyone else had a giant serving along with vanilla ice cream...the cobbler was GONE in no time!

Monday, February 16, 2015

Recipe Box: "Grilled" Tostadas

Having a new puppy in the house means I am not doing some of the things I normally do.  Like go through mom's recipe box for today's post!

So instead, I thought I'd share a recipe that had the ingredients I bought for one of mom's recipes. Dean saw them sitting on the counter and snagged them for a grilled version of a tostada while we all watched t.v.


Dean's Grilled Tostadas: 

1 pack corn tortillas
2-4 chicken breasts 
Shredded monty jack or cheddar cheese
1-2  cans Blue Runner or other type of re-fried beans
Seasonings like salt, Tony Chachere's or cayenne for kick, garlic powder, etc.
Toppings: Chopped tomatoes, shredded lettuce, salsa, sour cream and guacamole.

Cooking:

Heat the beans (I add a little salsa and sour cream to make them tastier and creamier.)  Set aside and keep warm.

Grill the chicken breasts and shred or chop the meat.  Set aside

Brush several of the tortillas with olive oil and sprinkle with a little salt and garlic powder.   We like them spicy so we add a little Tony's on them too.  Cayenne would work nicely if you don't have any Tony's.
Grill them quickly on both sides until they are crispy.  Don't LEAVE because they burn easily.  I suggest you have a couple extra on hand in case that happens.  Grill extra, they are great by themselves or with salsa.  

**Now just assemble the tostada to your liking.   Start by using either the beans or guacamole to hold the chicken and other toppings down.   I like to layer mine because I like toppings that fall off.   
Here is how I do it:
beans
lettuce
chicken
cheese
tomatoes
guacamole


** Since the tortillas are NOT fried, they won't stand up to wet ingredients for long so you have to assemble them right as you are getting ready to eat.   

These taste so fresh and are not heavy at all.    

Monday, February 9, 2015

Recipe Box:Brownies

Brownies....


Marilyn was my mom's best friend.  Over the years, through many moves, mom and Marilyn stayed close.

Mrs. Stringfellow's Brownies 

1.5 c sifted flour

2 c sugar
4 eggs
2 t. vanilla
1 t. baking powder
1/2 t salt
2/3 c butter
4 squares semi sweet chocolate

Melt the butter and chocolate together, set aside.  Beat sugar and eggs, set aside.  
Sift the flour along with salt and baking powder.  Mix all ingredients together and pour into a greased 13X9 inch pan.

Bake for 30-35 minutes at 325 degrees.


On the back of this recipe card mom had written:

"The first time I had these brownies was in the spring of 1948.  I was a senior in high school and Marilyn and I had them while on a picnic with ouf boyfriends."

Monday, February 2, 2015

Recipe Box: Juevos Rancheros

Last week I wanted to try a recipe my "Aunt Nutsie" used to make for brunch.  I LOVED this as a kid.   This is a small dish made for breakfast or brunch and uses just a few ingredients most folks have on hand.  It will feed 4-6 folks.


I ran across the recipe in mom's box and she had labeled it "Bette Nan's Whatchamacallit."
I knew it had to be good....if mom liked something but didn't have the proper name, she used made up words for it! 

Bette Nan's WHATCHAMACALLIT!

Ingredients:
3 eggs
basic seasonings
can chopped green chilies
shredded cheese
Worcestershire sauce

Grease an 8X8 glass pan with PAM
Pour a can of chopped green chilies on the bottom of the pan, spread out.
Sprinkle 2 cups of shredded cheddar cheese on top.

Mix  together:
3 eggs, 1 tsp Worcestershire sauce, some salt, pepper and garlic powder together.  Add a dash of Tabasco or cayenne.

Drizzle the egg mixture on top of the cheese and press down so all the eggs are mixed in.

DO NOT STIR.

Bake 25 minutes in a 325 degree oven.**   Cool 3-5 minutes and serve warm.   The chilies on the bottom keep the eggs from sticking.


**Next time I am going to raise the oven rack and broil the last couple of minutes to burn the cheese.

This is SO good!

Monday, January 19, 2015

Recipe Box...Squash Casserole

Before I start with the recipe, let me just say that I HATE SQUASH.

Okay, now that I've made that clear, let me go one step further and say, if you hate squash, you will be pleasantly surprised at how good this is!   

But if you like squash, you will LOVE this dish.  

People requested this all. the. time.  So, mom made it for company, for parties and for pot lucks.  

My mom was a great "comfort food" cook and even better baker but she really didn't like anyone in the kitchen with her....well, maybe dad but not the kids.  At least not while we were young.  Mom was a fast mover and we just got in the way. Unless invited to help out or hang out, it was best just to get out of her way.  Daddy used to call her "Hurricane Linda!"

Mom tended to just jot down ingredients with no directions.  After all, it was her recipe.  She knew what she was doing.   The steps are written up by me.
This is what the casserole looks like.  Sorry but someone scooped out servings before I took a photo!!!


Okay, so on to the recipe!  This is super easy and comes together quickly but you will have about 10 minutes of cooling time during this process so plan for it.

Linda's Made Up Squash Casserole (how is that for a fancy name?)

Ingredients:
2-3 quarts yellow squash, washed and chopped into chunks
1 large Vidalia or other sweet onion, chopped
2 fresh banana peppers, chopped
1 bell pepper, chopped (any color but green)
1 bunch green onions chopped and reserved.

2 eggs, beaten with 1 tsp salt and 1/2 tsp pepper
1 can cream of mushroom soup
2 cups shredder cheddar cheese

16 saltine crackers, crushed FINE, tossed with 1-1/2 cups shredded cheddar cheese 

To prepare.

Spray a medium sized casserole dish with PAM.  Note* a 9X13 is a little bit too big...
Preheat the oven to 350 degrees

Cover and cook the squash, onion, bell pepper and banana peppers over med heat until slightly soft.  Stir it every now and then.  This will take about 10 minutes.  You don't want the squash to get super soft.
Mix the green onions in and then remove from the heat and drain in a colander.  Squash has a lot of moisture and you don't want that in the casserole, mucking it up.

Set the colander aside to continue draining.  You will also need it to cool a bit too so the heat from the mixture doesn't "cook" the eggs.  This takes about 10 minutes.

While the squash cools, mix the seasoned eggs, 2 cups of cheese and soup together.

Once the squash has cooled, press it down one last time to get some moisture out.  Then mix the squash with the soup mixture.

Pour it all into the casserole dish.  Top with the cracker/cheese mixture.   

Bake uncovered about 30 minutes or until the cheese is slightly browned and it is all bubbly.


Monday, January 12, 2015

Recipe Box: Hot Chocolate

This last week was a seriously COLD one here in Louisiana!   We were down in the teens one night....the rest of the time we were in the mid 20's.  That is unheard of "in these parts..."  Never thought I'd have to run the pipes during the day!!!!

That being said, we bundled up and I made some comfy, hot dinners.  Comfort food is something Southerns do quite well, thank you very much.

I made potato leek soup.
I made kicking chicken chili
I made crawfish ravioli
I made my family HAPPY....

"People" in the house hinted that I left out sugar cookies when baking for the holidays so I obliged on Saturday....better late than never, right?


One morning I made this quiche....super tasty.  


By Sunday I was all cooked out but was craving something chocolately...and warm.  No way was I going into the kitchen to bake...not with those good sugar cookies on the counter.  

Instead, I made some decadent hot chocolate.


Curlygirl's first grade teacher held an annual Christmas caroling event followed by homemade cookies and cocoa at her house.   She was the neatest lady.  Most kids were terrified of her, but not Kaela. She adored her!
Anyway, she had this cocoa in one of those old fashioned coffee percolators and it was so good that I asked her for the recipe.

Believe it or not, I'd never made it before, which is nuts considering I had asked her for the recipe.  So, I pulled it out, made it and felt the need to share it.  It is SO good and so simple to make.  Be warned though, this cocoa is RICH.  As my dad used to say "A little dab-ble do ya."

Fig's Hot Chocolate recipe:

For a small batch:

Heat 2 cups of milk.

In a glass measuring cup you will make a slurry:
Boil: 3 TBLS of water.
Add: 5 TBLS of sugar
         3 TBLS of good cocoa
         dash salt.
*optional, 1/4 tsp vanilla.  I didn't use it.

Mix well until the sugar and cocoa are dissolved and incorporated.  
Add the slurry to the milk and mix well.  I use a teeny electric whisk.

Once the milk and slurry are blended, bring up to the heat you want, whisk a couple times to froth it and then serve.  Top with whatever you like.  We use whipped cream in a can around here.

Thank you to Ms. Figueroa, where ever you are, I hope you are happy and healthy!


Tuesday, September 16, 2014

Easy Peasy Salami Bread and Marinara Sauce...

A long, long time ago in a far away land, my sweet sister gave me an easy "new to cooking" recipe...and today I thought I'd share it with you!  It is seriously one of those "no-fail" recipes that a working girl can throw together quickly.  Just be sure to get the dough out of the freezer before heading to work!


Salami Bread (makes ONE loaf)

Frozen bread loaf
1 package salami (I use beef)  
1 package sliced provolone or mozzarella  OR shredded mozzarella
marinara sauce, *recipe below
garlic powder
Italian seasoning
(Note: you can use more salami and cheese than this, the amount you use is really a personal preference.)
Take out one loaf of frozen bread and thaw it out according to package instructions.  I'm making two to show you a variation.  Be sure to spray the plastic wrap with oil or the dough will stick!


Let them rise and rise and rise!  


Once it is thawed and has risen, punch it down and roll it out into a rough rectangle.  It doesn't have to be perfect.  I tend to roll mine and then stretch it a bit.  Don't forget to flour the board or counter so it doesn't stick.


Once the rectangle is done, sprinkle it with the seasonings .  I don't measure it but I'd say a teaspoon of each, maybe a little more.
Then layer the meat and cheese on top of that.  There are 8 slices of salami to a pack...2 are hidden under the cheese...


If you don't have sliced cheese, you can use shredded instead...just don't overload it.  Also, keep the cheese a bit away from the edge so the seam can close.


Roll it up jelly roll style, starting with a short end.  Don't be gentle, stretch the dough and secure the seam well.  Dough is so forgiving, just pull and yank until you get it the way you want it.  

Then pinch the ends closed.  This loaf has more meat and cheese in it, can you tell?  hahaha


Now put the loaf into a greased loaf pan, seam side down.  If you don't put the seam side down, the bread will open and all the stuff will pop out!  You can see the one of the left had more stuff inside of it so it is bigger (we ate that one first...)


Bake at 350 until golden brown.  About 20-30 minutes, depending on your oven.  You are only baking the bread, not the salami, so once the bread is done, everything is done!
Let it cool 5-10 minutes so the cheese won't glob out everywhere.

*For the sauce:
Saute half an onion that has been minced, (or rehydrate a palmful of dehyrated minced onions and saute a moment) add 4 crushed cloves of garlic, 1 can tomato paste, 1 small can tomato sauce,  2 cups of water. Juice of 1 lemon, salt and pepper, 1/2 tsp oregano, 1/2 tsp sugar and a scant tsp of chili powder for kick.*

To serve,  put a puddle of  marinara sauce on a plate and place a thick slice of the bread right on top.   YUM.


I serve this with a simple salad and it is always a hit.  Too bad Matt wasn't here to enjoy it this week!


Saturday, July 19, 2014

Mini Apple Pies

Each year for July 4th, I make my  cheesecake tarts.  My family loves them so much....some times, like this year, they didn't wait for the topping.  Just scarfed them down and ate the berries later.  

But...I don't like cheesecake.   I think cheese needs to be salty....not sweet!  So, this year after making the family their tarts, I made myself some little apple pies.  This way, I can eat a few and freeze the rest.  I didn't want a pie in a muffin tin, too little....but I had a mini loaf pan so used it.  It made the perfect single serving pie ever!


Okay, so if you are interested, here is how I made them:

Ingredients to make 9 mini loaf sized pies:

4 premade pie crusts from the refrigerator section, the kind you unroll.  
5-6 Granny Smith apples
1-ish cup of sugar...you may need a little more.
1-3 teaspoons of cinnamon (I use 3 but most folks like 1)
Scant teaspoon nutmeg if you like it.
2 tablespoons butter
2 tablespoons water
1 heaping tablespoon corn starch

*Egg wash is optional....mix 1 egg with a splash of milk, whisk to combine.

Peel and cube your apples into a bowl, sprinkling with cinnamon and sugar as you go to keep the apples from turning.  No need for lemon juice as granny smiths are tart!


Next put the water and butter in a pan and melt the butter, then add the apple mixture and cook for about 8 minutes.  Just to soften them a bit.  Add the cornstarch and stir well.


Get your pan and pie crusts out....I didn't grease the pans and the pies popped out just fine.


Cut the pie crust large enough to overlap....you want to seal these pies.  I left about an inch to hang out.  


Fill each little pie up, mounding it slightly.  Make sure some juice gets into each pie.  I eyeballed it and put enough juice into each pie to come halfway up the apples. 

Then top with more crust, seal around each pie, and cut vents in the top.


Brush the tops with the egg wash and sprinkle with a little cinnamon/sugar mixture.  Then bake them at 450 degrees for 10-15 minutes.  

Look how pretty!


I had 1 little pie stick...the one that I over filled with juice.  All the rest came out beautifully!

Friday, June 20, 2014

Easiest Brisket ever!

Okay, so with me being sick and all, I didn't feel much like cooking.  But this time of year, I go through our freezer and use all the meat up.  It's Hurricane Season y'all!  I discovered a 9 pound brisket in there and decided it had to go.    

The slow cooker is a sick girl's helper. Seriously.  I got tons of credit and did very little work. Love it.

Here is how you do it.  

Take a BIG ziploc baggie and put this in it:

2 cans beef broth
4 oz. soy sauce (yes, that is a lot.)
2 tablespoons liquid smoke
2 tablespoons vinegar (apple cider or white)
3-4 chopped garlic cloves (I use the stuff in a jar and put a big glob of it in there.)

Into this, carefully set the brisket that you have trimmed most of the fat off.  (You won't need it since it is going into a slow cooker.)  You also don't need to hack the meat up to absorb the marinade but Dean does it anyway....

Now seal it all up and put it in a dish and refrigerate it over night.  I flip it over at bedtime.

In the morning, put the brisket along with the marinade into the slow cooker.  Set it on low and forget it.  All day.  As in 8 hours.

My crock-pot is oval but I've done this in an old round one too....you just have to cut it in half and switch the pieces mid way through the day.

When it is done cooking, use tongs and pull the meat out, it will shred by itself.  At this point you decide to make gravy or make sandwiches....

This go round, we made sandwiches!  We love brisket on croissants...lucky me found croissant sandwich bread...how cool is that.


Now don't toss out the juices.  If you buy a large brisket like I do, you will have leftovers.  Separate the meat from the juice and refrigerate separately.  In the morning, pull out the juices...see that layer of fat?


Yep, grab a thin spatula and carefully slip it off the top.   It will come right off....so you can throw it away.


Then you can make gravy with the rest and you can have mashed potatoes to go with that leftover brisket.

Saturday, May 24, 2014

Basil Parmesan Chicken

Last week I was off for a few days and when I'm off, I cook!

Tuesday, I made a tomato sauce I found on pinterest.  Here is the link I used.
I had several tomatoes and threw in a large jar of tomatoes a friend gave me last year.  So, I added an extra red bell pepper, two heads of garlic and a couple onions.  I used more oil too....I roasted it for an hour at 425 and then turned the oven off and let it sit an additional hour. 


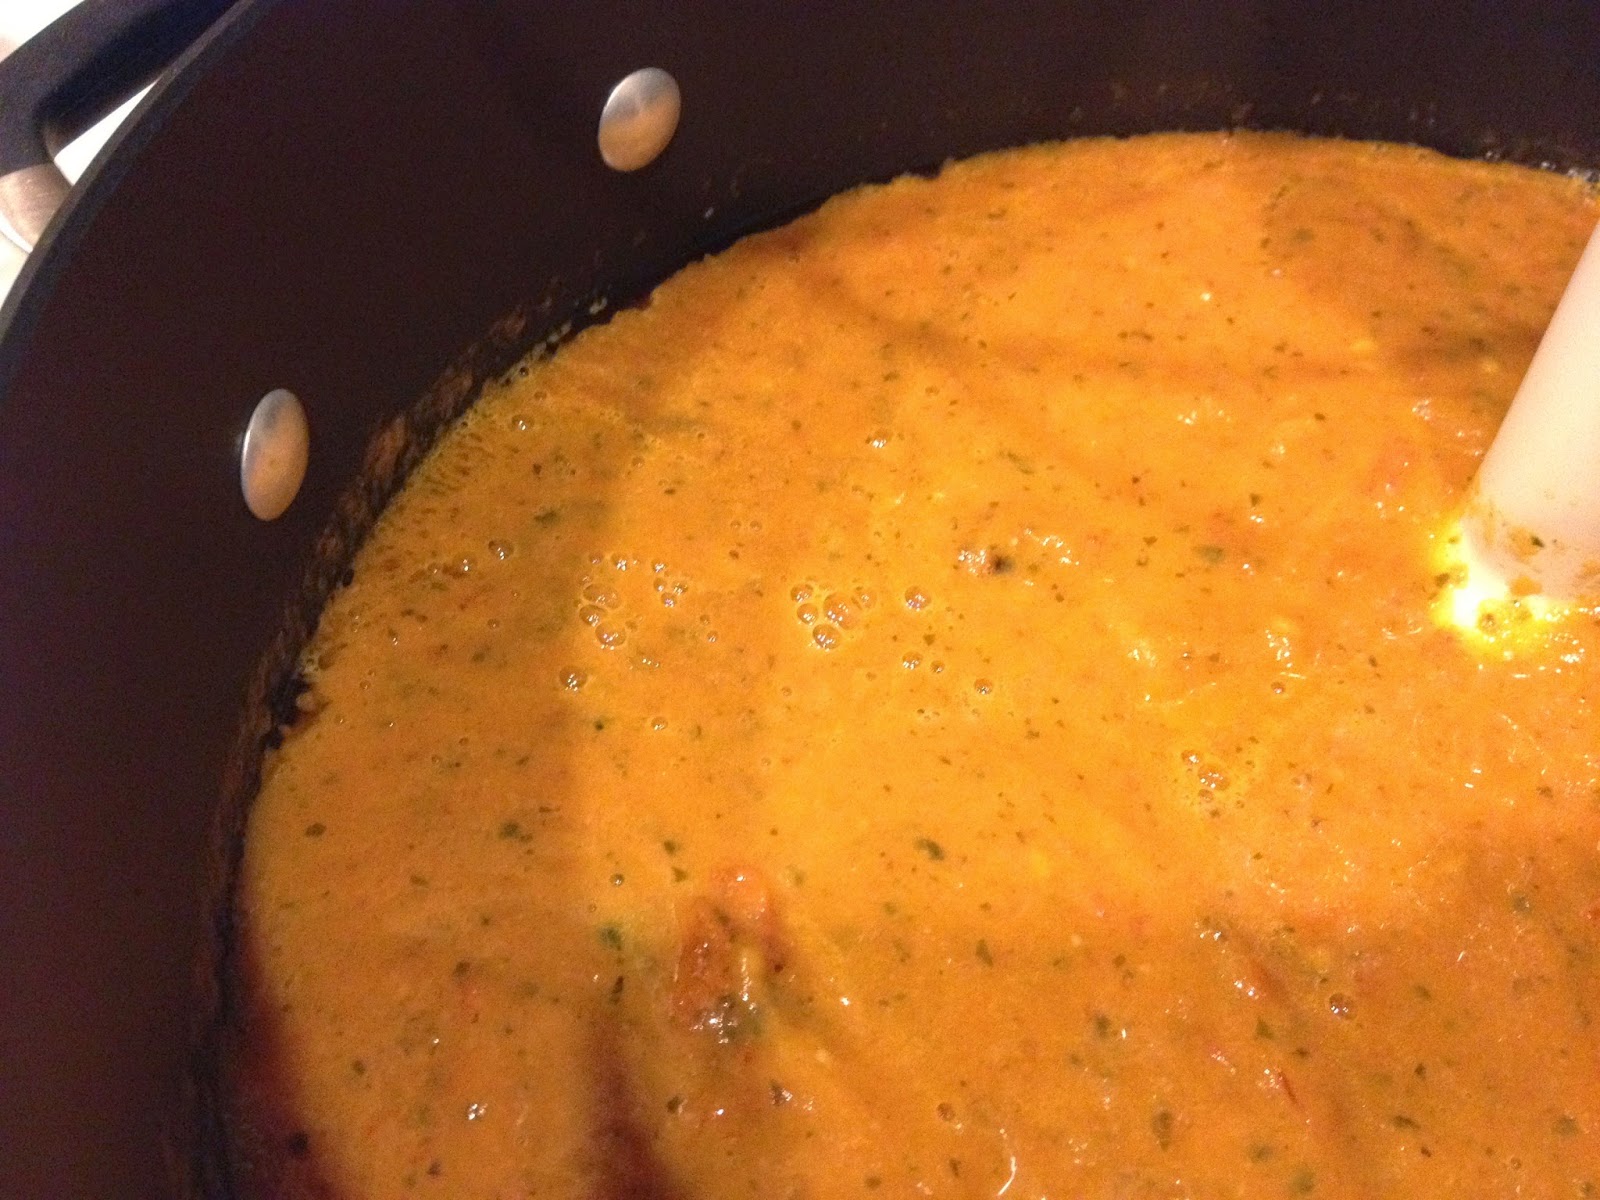
Oh my goodness, it is a lovely sauce and soooo easy.....after cooling a bit, I put it in the pot....


and turned it into this using an immersion blender.  No extra anything was needed...the jar of tomatoes had enough juice to keep it from being too thick.


soooo what to do with it?  I put it in the refrigerator over night to use the next day...that is, after dunking a lot of bread in it!


So Wednesday rolls around and I'm ready to use that sauce....here is what I did.
I took 2 sheets of my basil butter and melted it and mixed it with some Parmesan cheese and dunked the chicken in it before rolling it in seasoned bread crumbs.  Then I set it aside...

I heated some olive oil and fried them up 1-2 minutes each side...not long, just to brown them....and nestled the breasts in that AMAZING pasta sauce I made yesterday....


Once done, I covered everything with a little bit of shredded mozzarella and cheddar....and baked it at 350 until the chicken was cooked through (I used a meat thermometer to be sure.)

Pretty....


Matt wiped the leftovers out for lunch the next day....but I have ONE jar of that sauce left...


Hmmm..I think I need to make some focaccia bread...
Related Posts Plugin for WordPress, Blogger...