Saturday, February 28, 2015

February craftiness.....

Wow, this month FLEW past!  With a new puppy in the household, I stay busy with her.  She is growing and is happy....it is good to have so much energy in the house! 

I made this cozy as part of my craft challenge on my swap blog.  I had something else in mind but having recently become hooked on "The Walking Dead" series, I decided I'd make something with that in mind!    (During Mardi Gras break, we had several season marathons til 3 am.   Now we are caught up!)  


I continued with my CAL that Kerry is hosting and my stash of granny squares is growing.  I won't start putting them together until the summer.


And I made two scarves I've already blogged about here.  The color block one was supposed to be a Christmas gift but darling daughter snagged it for a friend!  

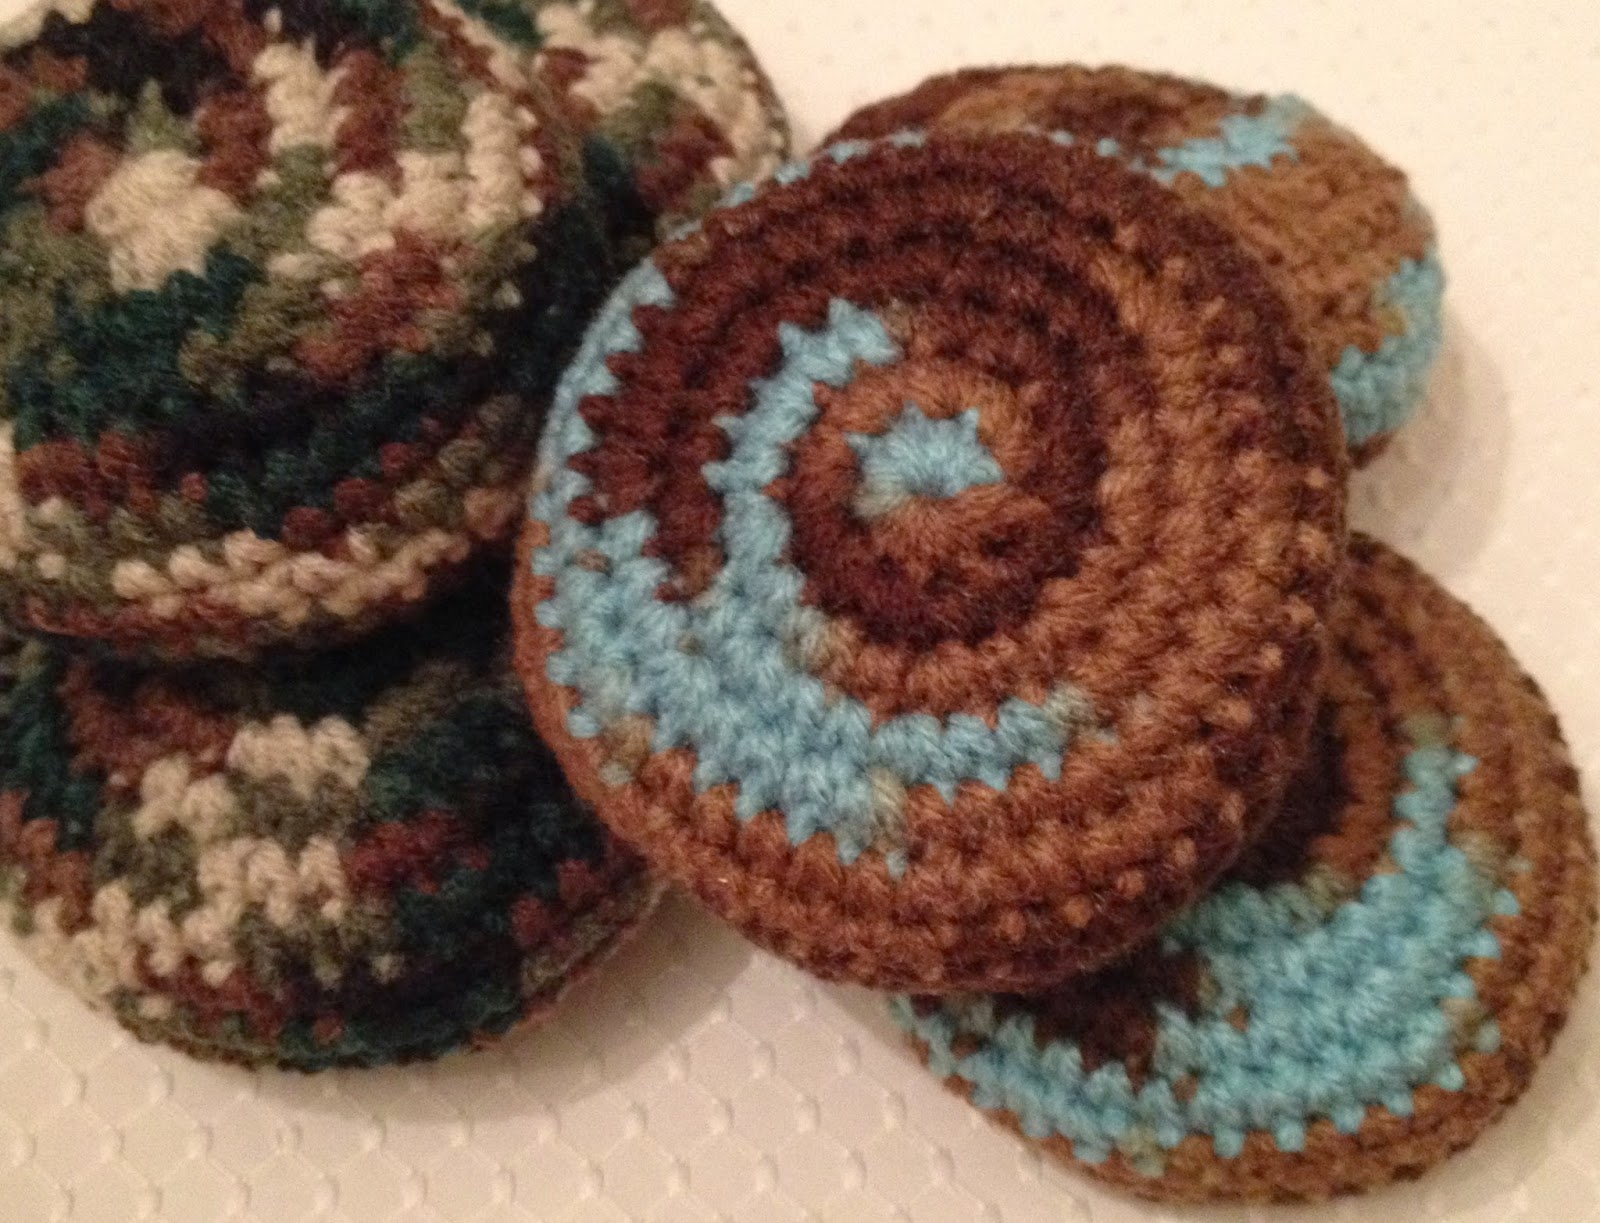
The last thing I made was a set of hacky sacks for a couple of my nephews.  I made 3 for each of them, that way they can also juggle with them if they want.


I found the pattern here via Tammy's blog.  They worked up quickly.  I already printed up the rules so all that is left is to store them away until Christmas!

Thursday, February 26, 2015

Drying parsley

Each fall, I harvest and dry my oregano.   This past year, I had some extra basil and dried that too.  I bought 10 bottles from a thrift store for 50 cents each and used some labels and chalk to dress them up before giving them away.  Fresh dried herbs are the best!  You know where they come from and they aren't dust....you can actually see the leaves.


The other day, I noticed that my flat leaf parsley was out of control....in a beautiful way. I cook with parsley but there was no way I could use all this.   I didn't want to waste it or let it go to bloom so I decided it was time for a hair cut.   I can always use more dried parsley!  


Here is how I dry my herbs....

First whack them and shake them HARD to get rid of anything creepy crawly on them.   Pull out anything not pretty.  Using about 18 inches of kitchen twine, tie them in smallish bundles upside down.  I use a slip knot.  
After knotting,run the twine through a branch below the knot.  That way, as it dries, the stems won't fall out of the slip knot.


Then stuff them leaf side down into brown paper lunch bags, let the twine hang out of the bag and clip the bag closed.  I clip mine closed right by the stems.  Don't overfill the bags or you run the risk of getting mold.

You can do this step without the bags but I like to use the bags because it catches anything that dries and falls off.  Sometimes I let them dry a few days without the bags and then add them later.


Then tie them to the rail in the wash room.  I use a slip knot here too.  This room gets hot and dry.  Perfect for drying herbs and letting bread dough rise!


Now all I have to do is let time do the work.  Once dried, I can strip the stems and put the parsley into the bottles I have.  

Tuesday, February 24, 2015

another drive by hooting!

Last week, I drove through a gas station and flung this little guy out the window as a lady walked in to pay for her gas.  He landed by her car door.  


As I drove off, I saw her come out and pick him up.  She looked around and laughed and drove off with him.

Friday, February 20, 2015

Rosemary...

5 years ago I bought a little plant for 3 bucks at Wally World.  

I named her Rosemary.   

She wasn't much to look at, but I knew with a little love, she would be fine.  She looked like this girl here....


She started  life out in a trough and was very happy.  


Rosemary started crowding her neighbors so I had to give her a place of her own.  

In 2013, I moved her far away, to the other side of the yard, against the house.  She became really happy and spread out....


As you can see, Rosemary has grown into a big beautiful girl.


She is happy here, in her little corner of the yard.  The best part is that she willingly shares her bounty with us!

Friday favorites

Okay, so these aren't exactly PRODUCTS....but here goes....

Osa's guilty face after I fussed at her for chewing on a chair leg!


Osa's cute "I gots a new toy" face...


Osa's "model pose"  Girl can work it!


Osa's hedgehog imitation....awwwww


And my face...being happy instead of sad. 


This year, Valentine's Day was bittersweet.   Mojo was born on Valentine's Day.  Our sweet boy would have been 14 this year.  If he had lived just a few more more months, he would have made it to his golden birthday.

Wednesday, February 18, 2015

Monday, February 16, 2015

Recipe Box: "Grilled" Tostadas

Having a new puppy in the house means I am not doing some of the things I normally do.  Like go through mom's recipe box for today's post!

So instead, I thought I'd share a recipe that had the ingredients I bought for one of mom's recipes. Dean saw them sitting on the counter and snagged them for a grilled version of a tostada while we all watched t.v.


Dean's Grilled Tostadas: 

1 pack corn tortillas
2-4 chicken breasts 
Shredded monty jack or cheddar cheese
1-2  cans Blue Runner or other type of re-fried beans
Seasonings like salt, Tony Chachere's or cayenne for kick, garlic powder, etc.
Toppings: Chopped tomatoes, shredded lettuce, salsa, sour cream and guacamole.

Cooking:

Heat the beans (I add a little salsa and sour cream to make them tastier and creamier.)  Set aside and keep warm.

Grill the chicken breasts and shred or chop the meat.  Set aside

Brush several of the tortillas with olive oil and sprinkle with a little salt and garlic powder.   We like them spicy so we add a little Tony's on them too.  Cayenne would work nicely if you don't have any Tony's.
Grill them quickly on both sides until they are crispy.  Don't LEAVE because they burn easily.  I suggest you have a couple extra on hand in case that happens.  Grill extra, they are great by themselves or with salsa.  

**Now just assemble the tostada to your liking.   Start by using either the beans or guacamole to hold the chicken and other toppings down.   I like to layer mine because I like toppings that fall off.   
Here is how I do it:
beans
lettuce
chicken
cheese
tomatoes
guacamole


** Since the tortillas are NOT fried, they won't stand up to wet ingredients for long so you have to assemble them right as you are getting ready to eat.   

These taste so fresh and are not heavy at all.    

Saturday, February 14, 2015

Teeny Tiny Toadstools...


Okay, so I made a bunch of teeny toadstools when creating these ornaments:


I've had a couple emails asking about them.....so thought I'd share the process.  This isn't a complete tutorial because I didn't take photos of the entire process.  That being said, if you are crafty at all, this will give you the general idea.

The items you'll need are:

hot glue gun for the moss
E6000 to glue the caps to the stems
polymer clay in white and red
clear nail polish to use as a clear coat
tiny wreaths
bits of moss, torn into inch sized pieces
floral wire, cut into 4 inch lengths
floral foam to hold the toadstools
tooth picks for painting dots
white paint for dots
small paint brush for it's tip to make toadstool caps.

First I made a ton of poly clay toadstool caps and stems.  I used red for the caps and white for the stems and made a variety of shapes of both.

1.  To make the caps, take a small pea size piece of clay.  Use the wooden tip of the paint brush and make a slight depression in the cap.  This is where the stem will fit into.  It doesn't have to be perfect.

2.  To make the stems, roll a pea size piece of clay between your fingers creating a tip at one end and a larger base at the other. 

Mass produce these before moving on.  You will NOT put the stems and caps on before baking.

3.  Cut a 4 inch piece of floral wire and insert it into the stem as far as it will go without poking through the top.

4.  Set everything on a baking sheet, spaced apart.  Bake according to directions and let cool.

5.  After baking, attach the stems to the caps with a little dot of E6000.  Let dry completely.

Once dry, I used a block of floral foam to hold the little toadstools up while finishing them. Here you can see how small they are.  Notice I didn't unwrap the foam.    Here they all are, ready for polka dotting.  


6.  To make the polka dots, dip a toothpick into the white paint to make the dots and just tap all over the cap until they look like you want them to.

Once painted, they look like this...let them dry completely.


7.  Coat everything with clear nail polish.   I use nail polish because it doesn't yellow, it drys without a sticky residue and I always have some on hand.  Let dry completely.

8.  To wire, take your tiny wreath and wire three of the toadstools to it like in the photo. I pushed the wire through some of the vine and around some, just securing it as I went.  Try to wire them as close as possible so it is easier to hide with the moss.  


Continue making all your wreaths in the same manner....mass production style.


9.  The last step is to cover the wires.  You'll need to tear some packaged moss into little bits then hot glue some of the moss onto the wreath to cover the wires.  


No need to work it between the toadstools, just fluff the moss up.  It is easy to move the toadstools since they are on wires.  Just push them aside, fluff the moss, and push them back into position.  You can always add more moss if needed.

Friday, February 13, 2015

day in the life...

Osa loves to hang on my robe....


Here she is, playing with her heart-worm preventative.  She played with it about 10 minutes but she ate it willingly.


Going to the donut shop....


Playing in the backyard for a couple hours while I read...


Taking a nap after a VERY busy day...


This is her little play yard.  We leave the gate open so she can come and go at will.   The only time I close the gate is when everyone goes to bed.    


Sometimes you forget how small she still is...

Wednesday, February 11, 2015

Crochet scarves

Kaela requested another lattice scarf, this time in red...


Before Christmas, I bought some Tobaggan yarn by Classic Elite.  It was on deep sale but you had to buy it prepacked.    I knew that I wanted to make a color block scarf when I bought the yarn.  I didn't want to do the same old half double crochet so hit pinterest.

I found this pattern by Fiber Flux.....

Here are the 2 changes I did:
I used a J hook to adjust for the larger yarn.  
I also reduced the turning chain from 5 to 3 as the chains are quite large in this bulky yarn.

So you couldn't see the seam, I *reserved enough yarn of the first color so that when I whipped it together, I whipped it on the same color instead of whipping two colors together.  I then continued working the scarf and changed colors, etc.   At the end, my last color "change" was back to the first color.  I worked the two rows and then whipped it together.

 (*To do this, I worked two rows, pulled them out, cut the yarn and set it aside.)  

I will use this pattern again, it is pretty and works up incredibly fast.  


The scarf is lovely and is going to be a gift for someone this Christmas.  (unless I snag it for myself????)

Monday, February 9, 2015

Recipe Box:Brownies

Brownies....


Marilyn was my mom's best friend.  Over the years, through many moves, mom and Marilyn stayed close.

Mrs. Stringfellow's Brownies 

1.5 c sifted flour

2 c sugar
4 eggs
2 t. vanilla
1 t. baking powder
1/2 t salt
2/3 c butter
4 squares semi sweet chocolate

Melt the butter and chocolate together, set aside.  Beat sugar and eggs, set aside.  
Sift the flour along with salt and baking powder.  Mix all ingredients together and pour into a greased 13X9 inch pan.

Bake for 30-35 minutes at 325 degrees.


On the back of this recipe card mom had written:

"The first time I had these brownies was in the spring of 1948.  I was a senior in high school and Marilyn and I had them while on a picnic with ouf boyfriends."

Saturday, February 7, 2015

Magic Balls of yarn

I made a scarf using a magic ball a few weeks ago.  I love all the colors and textures...


and it is so pretty as a scarf....


I loved it so much that I went out and bought 4 more!   When I walked into my LYS, the salesgirl freaked.  She had only seen it knit into a shawl...she said she wished I had been there to show some ladies how pretty it was crocheted because they were looking at it but didn't knit.    

If you look at the "tassels" you can see all the different yarns being used in that particular ball.  


Some will be made into gifts but I may have to keep ONE more for myself!

Friday, February 6, 2015

Sleepy days

Okay, so here are some cute puppy photos of Osa taking a nap....


She found Ginger's old bed....and had a blast making it comfy.


On the couch


On the tile...


On Dean's lap...
By the couch...

Puppies and sleep...best friends forever

Wednesday, February 4, 2015

Make it Monthly

January's make it monthly....

A pretty lattice pattern scarf for my neighbor's daughter.


And several kitchen scrubbies....


I'm going to give these in sets of 6 along with a bottle of dish washing liquid from Bath and Body Works.


Not a bad start, considering all the other stuff going on!

Monday, February 2, 2015

Recipe Box: Juevos Rancheros

Last week I wanted to try a recipe my "Aunt Nutsie" used to make for brunch.  I LOVED this as a kid.   This is a small dish made for breakfast or brunch and uses just a few ingredients most folks have on hand.  It will feed 4-6 folks.


I ran across the recipe in mom's box and she had labeled it "Bette Nan's Whatchamacallit."
I knew it had to be good....if mom liked something but didn't have the proper name, she used made up words for it! 

Bette Nan's WHATCHAMACALLIT!

Ingredients:
3 eggs
basic seasonings
can chopped green chilies
shredded cheese
Worcestershire sauce

Grease an 8X8 glass pan with PAM
Pour a can of chopped green chilies on the bottom of the pan, spread out.
Sprinkle 2 cups of shredded cheddar cheese on top.

Mix  together:
3 eggs, 1 tsp Worcestershire sauce, some salt, pepper and garlic powder together.  Add a dash of Tabasco or cayenne.

Drizzle the egg mixture on top of the cheese and press down so all the eggs are mixed in.

DO NOT STIR.

Bake 25 minutes in a 325 degree oven.**   Cool 3-5 minutes and serve warm.   The chilies on the bottom keep the eggs from sticking.


**Next time I am going to raise the oven rack and broil the last couple of minutes to burn the cheese.

This is SO good!

Sunday, February 1, 2015

February's theme


For all you zombie lovers out there that are tired of Valentine crafts already...

Cold Hands NO HEART!


Create a zombie related coffee cozy that you can wrap your cold, dead hands around in order to warm them up.  Or make some mittens, gloves.....anything that will warm you up!

Pop by the swap blog for more details......


Related Posts Plugin for WordPress, Blogger...