Our dogs love to shred them so they are cheap toys. I also give them to teachers up at school. One day, I needed something quick to add to a swap I was in and decided to use the tp tube as a base for a pincushion.
This is what I created that day:

It turned out pretty cute so I thought I would make a tutorial to share.
Supplies:
empty tp tube
polyfil
needle and thread
scissors
tape
fabric
thin batting or white felt
beans, gravel or pebbles to weigh the tp roll down
decorative button for cap of toadstool
Make the stem:
First of all, cut the tp tube to the desired length for the stem.

Next, lay the tp tube down onto the felt and cut out the felt to fit around the tube with about a 1/4 inch extra to fold into a seam. Leave about 1 inch of fabric on EACH open end of the tube. You'll tuck this in later.

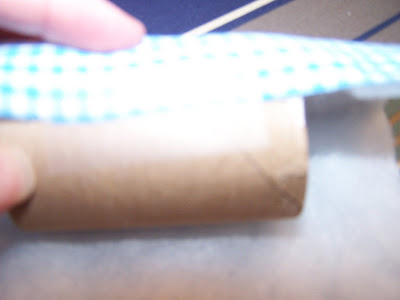
Secure 1 end of felt and fabric to the long side of the tp tube with tape. Sorry for the blurry photo!

Roll up to the edge, fold over other side to create a nice edge

and pin to secure it

Sew up the side with a blanket stitch using either thread or embroidery floss.

Tuck the 2 open edges inside the tube.


If you left an inch of fabric, it should stay nicely...if not, secure the fabric to the INSIDE of the tube with a small piece of tape.
It should look like this when done.

Using a large spool of thread as a template, draw a circle onto stiff paper stock and cut it out. Again, cover with felt and fabric. This time, just tape the edges to the inside.
The bottom doesn't have to be perfect.

It should fit snuggly INSIDE the lip of the tp tube. You want it just to the edge of the tube, matching up the edges before sewing.
Sew on using a blanket stitch.

Fill the tube 3/4 of the way with beans or pebbles.

Top with either some polyfil or felt and press it down into the top of the tube. When you shake the tube, nothing should rattle. It is important that the stuffing isn't falling out, it should sit snuggly on the tube. I've used felt AND polyfil and both work fine.
Make the cap:
Cut out a circle from coordinating fabric...about a 9 inch circle or larger depending on what you like.

Baste around the edge of the circle.

Draw up the edges and stuff with polyfil. Sew closed tightly, using several knots.
The bottom will have 'gathers' of fabric, this is normal.

Do NOT cut thread off.
Taking your needle, poke it up from the bottom to the top of the cap and slide on your button. Push needle back down and pull thread tightly while smushing the cap of the mushroom. Don't pull the thread too hard or it will break. Then knot several times.
This gives your cap a smushed look and tightens everything up.

Do NOT cut thread off.
This part is tricky because you don't want the beans falling out. Place cap onto stem and then flip updside down to sew the cap on. I used whip stitch to secure the cap tightly onto the stem.
You'll be working at an angle. While pressing the cap down to secure, be sure not to crush the tp roll!
Secure all the way around, finish with a double knot.

Flip it over and you are ready to use your new pincushion!

Here are the three I made in about an hour and a half:

I hope you enjoy this little tutorial!


10 comments:
Oh Val - those are sooooo cute! To think I just recycled all my TP rolls. Well, that's one thing about TP rolls - there are always more, right around the corner :-) Thanks for sharing your cute project!
These are the cutest mushrooms - thanks for the tutorial.
Darling, Val! Lori
adorable!!! I'm going to try this one for sure!
:) Missy
Cute tute!!
I'm also in the Nancy Drew Swap - sounds like fun, doesn't it? I just read my book and am mulling over ideas!
Very cute. My dogs also like shredding them. Must be universal. I saved heaps for our Daycare, but sadly due to "hygiene issues" Daycares and School here no longer will accept them.
How cute.
so cute and sew easy too! My kind of thing.....
Hey Val! Thankyou for this easy-as tutorial! Reminds me almost of this one-
http://thelittlehousebythesea.wordpress.com/2008/11/03/toadstool-cottage-and-mushroom-house-%E2%80%93-free-pattern-and-tutorial/
Go check it out!
too flippin cute!
Post a Comment